There are times in your life when you feel something is impossible, but you keep persisting, until you make a small crack, and then everything looks so obvious to you, and you think, "Gosh! It's so easy!". This is the first time I tried developing a UEFI application. What I thought would be a one night hack, took me almost two days, two troublesome days. UEFI application development lacks a lot in user created created content - blogs, examples, discussions, forums, etc. For developing UEFI we have a 2700 page UEFI spec, and other esoterically written documents, which would not appeal an average developer just wanting to try out stuff.
I am going to share my experiences with UEFI, in the hope that it will save trouble for someone else trying to do the same.
I am running Ubuntu 15.10 on ASUS K55VM, which is a 64bit i7 laptop, manufactured in 2012.
First things first
Before moving any further, I would suggest you to go through this blog, to get a taste of developing and running a very simple UEFI application:
Programming for EFI: Creating a "Hello, World" Program .
UEFI development is different from developing your usual C/C++ application. For example you will not find any "
main()" function, since the entry point to the UEFI application is given by the associated configuration file.
for eg. In the
"MyWorkSpace/AppPkg/Applications/Hello" application in UDK (UEFI development kit), the entry point of Hello application is defined in
"Hello.inf".
[Defines]

   INF_VERSION                    = 0x00010006
   BASE_NAME                      = Hello
   FILE_GUID                      = a912f198-7f0e-4803-b908-b757b806ec83
   MODULE_TYPE                    = UEFI_APPLICATION
   VERSION_STRING                 = 0.1
   ENTRY_POINT                    = ShellCEntryLib
The
ShellCEntryLib library instance wraps the actual UEFI application entry point and calls the
ShellAppMain function.
Setting up the development environment
There are several SDKs for developing UEFI, I have tried two of them -
EDK2, and
BITS (BIOS Implementation Test Suit) (I also tried UDK, but without much luck, EDK2 and UDK look quite the same to me, maybe they are, maybe it's because I tried EDK2 at a later stage, when I had better understanding that it worked). Although it is recommended you download both, as it will help in finding code samples from both the suits, personally I feel BITS is better since, it provides with a python shell, which makes it very easy for beginners like me to try out stuff.
1. BITS (Recommended)
git clone --recursive --depth 1 https://github.com/biosbits/bits
- Read "README.Developers.txt" , and install the dependencies.
sudo apt-get install xorriso mtools binutils bison flex autoconf automake
- Now you will have "bits-latest.zip", in the folder, extract it, and "cd" into it.
unzip bits-latest.zip
cd bits-2001/
- Prepare a USB drive, on which the UEFI application can be loaded. I will assume that the USB drive is /dev/sdb, and it gets mounted at /media/uefi, change these according to what you see in your PC.
#get rid of partition table, and partitions (optional)
sudo dd if=/dev/zero of=/dev/sdb bs=1M count=512
#make sure the write is flushed to USB
sync

#create mbr partion table, a new partition, and set bootable flag on this
sudo fdisk /dev/sdb

#fdisk console starts
  Command (m for help): o
  Created a new DOS disklabel with disk identifier 0xf1fa6ab4.

  Command (m for help): n
  Partition type
     p   primary (0 primary, 0 extended, 4 free)
     e   extended (container for logical partitions)
  Select (default p):

  Using default response p.
  Partition number (1-4, default 1):
  First sector (2048-15633407, default 2048):
  Last sector, +sectors or +size{K,M,G,T,P} (2048-15633407, default 15633407):

  Created a new partition 1 of type 'Linux' and of size 7.5 GiB.

  Command (m for help): a
  Selected partition 1
  The bootable flag on partition 1 is enabled now.

  Command (m for help): w
  The partition table has been altered.
#fdisk console ends
#sync to make sure all changes are done
sync
- To make sure that the changes to disk have been recognized by the operating system, remove, and reinsert the USB disk.
- Format the first partition of the disk ("/dev/sdb1") with fat32. Use gparted for this.
- Make the disk bootable (make sure that "/dev/sdb1" is mounted at "/media/uefi", else make changes in the commands according to your system).
#run commands as root
sudo su
syslinux /dev/sdb1
cat /usr/lib/syslinux/mbr/mbr.bin > /dev/sdb
- Copy some files from bits-2001 directory to the USB
cp -r boot efi /media/neo/uefi/
sync
Now you are ready to boot the USB disk. Make sure UEFI is enabled in BIOS settings, and select the USB drive while booting.
Once it boots, select
"Python interactive interpreter". Write your first code in the python shell.
Here is a screenshot from a Dell Latitude E5450.
 |
| UEFI Python shell on Dell Latitude E5450 |
2. EDK2 (May Skip)
git clone --depth 1 "https://github.com/tianocore/edk2.git"
cd edk2
make -C BaseTools
. ./edksetup.sh BaseTools
build -a X64 -b RELEASE -p MdeModulePkg/MdeModulePkg.dsc -t GCC46
Important : In the above bash code, notice the line
". ./edksetup.sh BaseTools". It is "<dot><space><path to edksetup.sh><space><BaseTools>". There is no typo, the <dot><space> notation is used in bash for sourcing, see this.
Building Qemu Bios (Requires EDK2) - Running UEFI applications in QEMU
OVFM - OVMF is a port of Intel's tianocore firmware to the qemu virtual machine. This allows easy debugging and experimentation with UEFI firmware; either for testing Ubuntu or using the (included) EFI shell. All the online manuals, and resources I found for this were outdated, this is the method which finally worked for me.
Thus it is important to build an
OVFM binary. Go to the edk2 folder, as above, and do the following.
cd edk2
#build ovfm
OvmfPkg/build.sh
#the built binaries will be in Build/OvmfX64 directory. FV contains firmwares
cd Build/OvmfX64/DEBUG_GCC49/FV
sudo qemu-system-x86_64 -L . -bios OVMF.fd -usb -usbdevice disk:/dev/sdb
Here are the screenshots.
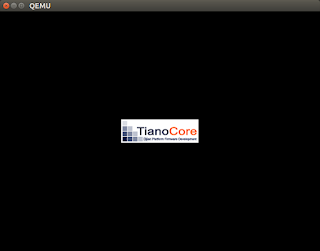 |
| Initial splash screen - Qemu running OVFM |
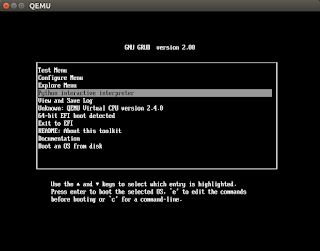 |
| The USB drive had BITS running on it |
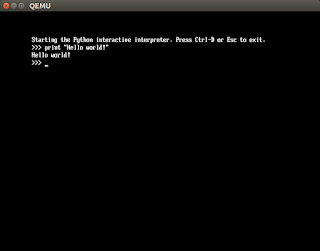 |
| Hello world in UEFI Python shell in Qemu |
Resources -
- My Github repo for UEFI
- UEFI EDK2 Build Howto On openSUSE12.1
- Getting Started Writing Simple Application
- UEFI Driver Writer's Guide
- Driver Developer
- Beyond BIOS Developing with the Unified Extensible Firmware Interface
- UEFI specification
- uefi.org learnign center
- Programming for EFI: Creating a "Hello, World" Program


